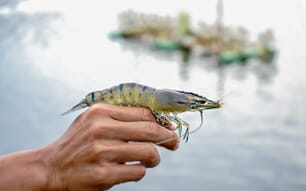
Marine shrimp are traditionally cultured in coastal or estuarine waters. However, inland culture is now being done in many countries. In the United States, farmers in Alabama, Arizona, Florida, Illinois, Indiana, Michigan, Mississippi, South Carolina and Texas have successfully reared marine shrimp using low-salinty groundwater.
The Pacific white shrimp, Litopenaeus vannamei, is the species of choice of the shrimp farming industry in the western hemisphere. The species is found in waters with a wide salinity range (1 to 40 ppt). The high tolerance of L. vannamei to low salinity and the year-round availability of healthy post-larvae (PL) make this species an excellent candidate for inland farming.
There is little published information about the growth and survival of this species in well water or inland surface water. Some of the first reports were from West Texas, where this species was successfully produced in earthen ponds (86.7 percent survival). The shrimp grew from 1.2 g to about 20 g in 120 days at a stocking density of 25 shrimp/m2. There are also reports of super-intensive culture (109 shrimp/m2) in earthen ponds (0.1 ha) in the Sonora Desert of Arizona, with production as high as 12,000 kg/ha in low-salinity groundwater of 2.0 ppt.
Because of variations in water and soil, some farmers have had problems rearing this shrimp while others have been successful. In Thailand, where water for inland shrimp culture is prepared by diluting brine solution (100 to 250 ppt salinity) from coastal, seawater evaporation ponds with fresh water, most ponds have ionic concentrations similar to that expected for seawater diluted to the same salinity. However, in Ecuador and the United States, where shrimp are cultured mostly in groundwater, many ponds have much lower concentrations of potassium and magnesium than expected in diluted seawater.
Researchers have been working to identify reasons for differences in survival and growth among farms, and to develop strategies for acclimating and producing shrimp under various conditions. The first thing a farmer must determine is whether or not his water is suitable for shrimp culture. If it is suitable, he must know how to acclimate shrimp to the low-salinity water. Once the PL or juvenile shrimp are acclimated to local conditions, the farmer must deal with typical production issues such as feeding, maintaining water quality (including ionic profiles), and managing blooms of undesirable algae.
Water Suitability
Before culturing any species, one must evaluate the suitability of the water through both chemical and biological tests. The ionic composition of water appears to be more important than the salinity. It has been demonstrated that single salt solutions of sodium chloride are not suitable for shrimp culture at any salinity, even though in seawater the ions most important in osmoregulation are chloride and sodium. Current research suggests that if the salinity is adequate, calcium (Ca), potassium (K) and magnesium (Mg) are the most important ions for shrimp survival. Any of these ions can be limiting, but often a lack of K is the most important factor affecting shrimp. It should be noted that although high levels of Ca also seem to be necessary, the ratio of Ca:K, which is about 1:1 in seawater, may also be important. In waters where the Ca:K ratio is high, the addition of K to reduce this ratio has been helpful.
Unfortunately, there are many interactions between minerals in low-salinity waters so there is no clear rule-of-thumb. In general, water is suitable for shrimp culture if:
- salinity is above 0.5 ppt;
- levels of Na, Cl and K are similar to the levels in seawater diluted to the same salinity;
- it has a high concentration of Ca; and
- alkalinity is more than 75 mg/L.
For example, seawater with 35 ppt salinity has 0.38 ppt K; therefore, with 4 ppt salinity well water the desirable levels would be 0.043 ppt or 43 ppm K (0.38/35 x 4 x 1000). Another way of calculating the level of various minerals is to multiply the salinity (in ppt) by the following:
calcium—11.6
magnesium—39.1
potassium—10.7
sodium—304.5
chloride—551.0
sulfate—78.3
For example, if water has a salinity of 4 ppt, then the diluted seawater equivalent concentrations would be:
calcium—46.4 mg/L (4 ppt x 11.6 ;
magnesium—156.4 mg/L;
potassium—42.8 mg/L, etc.
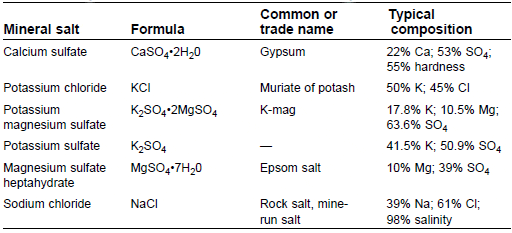
Ponds with less than 75 mg/L total alkalinity benefit from the application of agricultural limestone at the rate of 900 to 1,800 pounds per acre (1,000 to 2,000 kg/ha) to increase the bicarbonate ion concentration and alkalinity. If the water is low in K and/or Mg, a number of agricultural products may be added to improve the ionic profile. See Table 1 for a list of other mineral salts used in aquaculture.
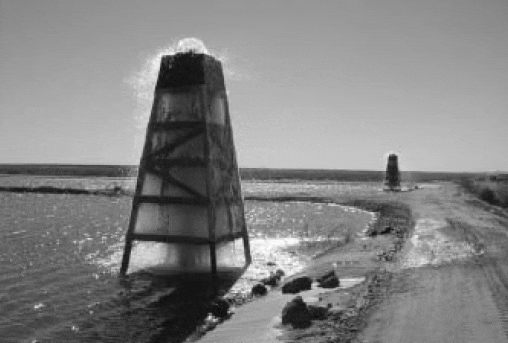
Another problem with inland waters is that they are often supersaturated with gases such as H2S or CO2, and/or minerals such as iron, that may cause problems as they come out of solution. Some of these problems can be minimized by using a settling/ageing pond or aeration/contact towers (Fig. 1).
Salinity Acclimation
Post-larvae are typically purchased from commercial hatcheries and shipped in water with near oceanic salinity (28 to 35 ppt) because they cannot tolerate low salinity. The PL must be acclimated to ambient salinities (and ionic profiles) before moving them into grow-out facilities. Acclimation procedures in brackish water or seawater are well established and can be found in the scientific literature or requested from an aquaculture Extension agent or specialist. However, because ionic profiles of inland, low-salinity well water often vary considerably from that of marine brackish water, acclimation is more stressful.
Specific protocols for low-salinity acclimation vary with salinity, culture methods and resources. In general, a 10-day-old PL can be acclimated only down to 4 ppt with good survival. However, shrimp older than 15 days may be acclimated to a lower salinity. There is a clear interaction between PL size and health and other stress factors (shipping stress, temperature, dissolved oxygen) that influence acclimation. Each situation must be evaluated independently. If the hatchery has the capacity and the shrimp are at least 8 days old, they can be pre-acclimated from the typical 28 to 35 ppt of the hatchery to as low as 15 ppt. The salinity should not be reduced below 15 ppt because PL do not transport well at lower salinities.
Properties of Mineral Salts for use in Aquaculture.1
Dose (g/m3) = Desired concentration of variable (mg/L) ÷ Percentage variable in salt/100
For example, if you want to use muriate of potash to increase potassium concentration by 25 mg/L:
Dose of muriate of potash = 25 mg K/L ÷ 50% K/100 = 50 mg/L
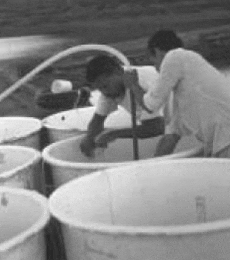
Two acclimation strategies are commonly used by shrimp farmers. One is temporary holding (Fig. 2) followed by short-term acclimation (less than 8 hours). The second involves longer holding or nursing (Figs. 3a and 3b) followed by a slow acclimation. Both techniques have advantages and disadvantages. Short-term acclimation can be used only if the PL are old enough for acclimation, the water source is well suited for culture, and the environmental conditions in the grow-out facility (primarily temperature) are suitable for culture. Nursery systems are required if the PL are too young for acclimation, if they are weak from shipping stress, if the environmental conditions of the grow-out system are inadequate (i.e., pond water temperature is < 68 °F, 20 °C), or if the farmer would like to stock a larger shrimp.
Receiving Post-larvae
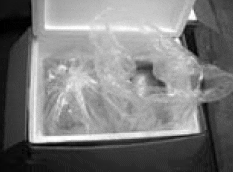
The first thing to do upon receiving PL is to check the shipment. If the PL are shipped in bulk in transport tanks, the water quality of each tank should be checked. Dissolved oxygen, temperature, pH and salinity should be determined immediately and water samples collected for ammonia testing. This information is critical to identifying potential problems with the shipment and is good information to give back to the hatchery. If the shrimp are received in oxygen-filled bags (Fig. 4), the water quality (dissolved oxygen, temperature, ammonia, pH) should be checked in a few randomly selected boxes. Each bag should be inspected to ensure that it is inflated and intact. Any problems (deflated or broken bags) should be noted and handled promptly. If the salinity of the receiving water is similar to that of the shipping water (< 4 ppt difference), then only temperature acclimation is required. The most common method is to float the bags in water of the same temperature as the culture water, allowing for a slow temperature acclimation (< 7.2 °F or 4 °C per hour). During this time the bags should be left sealed and in the shade. Bags that are opened can either be re-sealed with fresh oxygen or left open while aerated with oxygen. Once the temperature in the bags is equivalent to the ambient water temperature ( 1 to 2 hours), the bags can be opened and water added to allow final acclimation to the temperature and ionic composition of the culture water. After acclimation, the PL can be counted (see below) and released.
If the salinity of the receiving water differs by more than 4 ppt from the shipping water, the shrimp will need to be acclimated gradually to the salinity of the culture water. This can be done over a relatively short period of time (acclimation) or over an extended period of time (acclimatization). With very low salinity water (< 4 ppt), the longer the period of acclimation the easier the transition will be for the shrimp. It takes 24 to 48 hours for a shrimp to completely adapt to a new salinity. Thus, mortality might occur 2 days later and the farmer might be confused as to the cause of death. If the shrimp are released into a pond where survival cannot be monitored, a sample of shrimp should always be held back to evaluate survival. This is often done by placing a known number of shrimp (100 to 200) in a floating container in the pond. The shrimp are then collected 24 to 48 hours later to estimate survival rates.

The acclimation of shrimp in individual bags is easy to do on a small scale but is not practical on a large scale. Hence, an acclimation center should be set up to handle large numbers of shrimp. This could be as simple as an oxygenated tank placed near a pond or as sophisticated as a building constructed specifically to receive and acclimate shrimp. In either case, the acclimation tanks should have supplemental oxygen, a screened drain and a water source.
Acclimation (Short-term Adaptation)
After the bags or tansport tanks are inspected, shrimp should be transferred to the acclimation tank and a sample of the PL should be collected and evaluated under a dissecting scope (see the PL evaluation section). PL can be released by emptying the bags or using a siphon to transfer them from the transport tank. In both cases, the containers’ inner walls should be rinsed with clean water to ensure that all shrimp are transferred. Once the shrimp are in the acclimation tank, new water should be introduced slowly to allow a gradual transition of temperature and salinity. Dissolved oxygen (DO) concentration should be monitored diligently to make sure it remains near or in excess of saturation. As water temperature rises, so will the activity of the shrimp, making the oxygen concentration drop quickly. Temperature changes should not exceed 7.2 °F per hour (4 °C per hour). Salinity should not be reduced more than 4 ppt per hour down to 4 ppt. If further reductions in salinity are required they should not be made at a rate higher than 1 ppt per hour. Once the shrimp are acclimated, they can be concentrated and counted (if desired), then stocked into grow-out facilities.
If the PL are not of suitable age or you want to hold them for an extended period, they should be kept in a nursery facility. A welldesigned and properly managed nursery facility offers the following advantages: 1) it gives the PL time to recover from shipping stress before the stress of acclimation; 2) it keeps the shrimp concentrated so that shipping mortality can be estimated more accurately; 3) it allows PL to be quarantined to minimize the risk of introducing diseases onto farms; 4) it produces older PL that are better at handling the stress of salinity acclimation and predators (dragon fly nymphs); 5) it allows for a more accurate count of PL before stocking; and 6) it allows the farmer to purchase shrimp before the ponds are ready to be stocked. Direct stocking of PL is probably the most common method of stocking, but nursery systems are becoming more common because of their advantages. We currently recommend holding PL for 5 to 10 days before releasing them into the grow-out ponds.
Acclimatization (Long-term Adaptation)
Acclimatization methods will depend on the system’s design, available resources, and the salinity of the water in which the shrimp are shipped. Under most circumstances, the nursery system should be one-fourth to one-half filled (i.e., filled to the lowest water level at which aeration and circulation equipment will work). If slotted airlift pumps are used in the nursery tank they will create good circulation and aeration even at minimal water depths. The salinity of the water should then be increased to 15 ppt using a high-quality artificial sea salt. Note: There are many grades of sea salt; some are not suitable for invertebrates.
If the salinity of the shipping water and the nursery water are the same, then only temperature acclimation is required. If the salinity is different the shrimp need to be acclimated for both salinity and temperature as previously described. The primary difference is that they will be only partially acclimated to the final salinity of the grow-out system, and that some artificial sea salt has been added to the water to ensure a suitable ionic profile. Once the PL have been acclimated, fresh lowsalinity water should be added slowly, gradually filling the system over a few days. Because the shrimp are in water that should have an ionic profile reasonably close to that of diluted seawater, and if they were properly acclimated, any mortality in the first 48 hours can be attributed to shipping stress and the quality of the PL. Once the shrimp have been stabilized, the salinity can be gradually reduced even more to that of the final grow-out system. This can be done over a few days, making sure that the shrimp are at least 15 days old when the salinity falls below 4 ppt and that the target salinity is reached at least 48 hours before shrimp are stocked into grow-out facilities.
Shrimp held in a nursery system must be offered newly hatched Artemia nauplii and a high quality postlarval feed. Newly hatched Artemia can be offered at 100 nauplii per PL per day, with the daily allotment split into two feedings. Artemia nauplii are typically provided the day the PL are received (day 0), the following day (day 1), and two days later (day 4). Artificial feeds should be offered by hand (four to five times per day) or semicontinually using automatic feeders. It is extremely important that the shrimp start to feed immediately.
Estimating Numbers
Volumetric Counting of Early PL
The most common way of counting PL is to concentrate them in oxygenated water and then take samples to determine the number of PL per unit volume. This method works well for small PL, but not as well for PL more than 20 days old. Sample size can vary depending on the harvest basket volume, PL density, and hatchery personnel preference.
To do volumetric counts one needs: 1) a concentration container; 2) small containers of known volume when full (e.g., beakers or cups with no spouts); 3) at least five small containers to hold several subsamples; and 4) plastic spoons to make counting easier (an eye dropper or white plastic bowl with a pour spout also can be used) (Fig. 5).
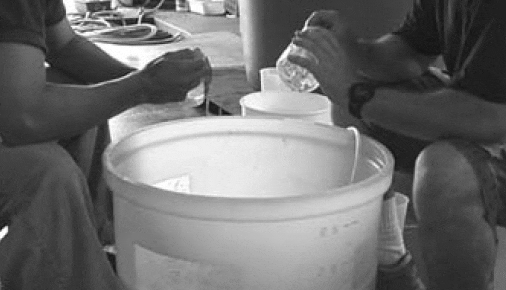
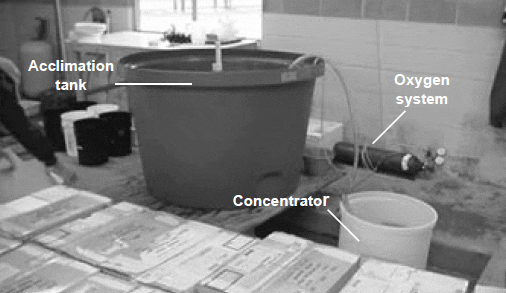
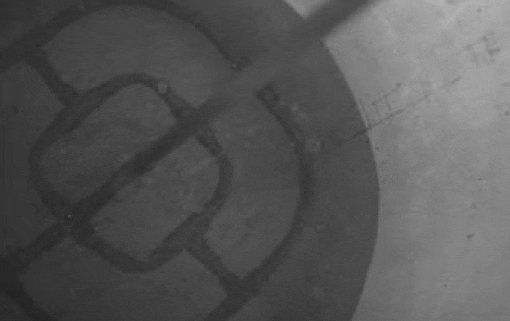
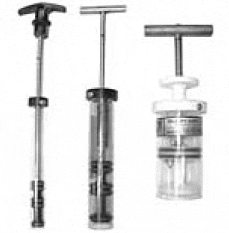
The concentration container can be made from almost anything, but it must have a known volume. Figure 2 shows an example of simple outdoor tanks with marked volumes that are used for acclimation and counting before stocking. We use a polyethylene tank with holes cut in the sides; the holes are covered with 250-micron screen mesh so water can overflow without losing shrimp (Fig. 5). The PL are drained from the acclimation tank into the concentrator using a flexible 2-inch (5-cm) hose, making sure that PL are not trapped on the screen as the water flows out (Fig. 6). Make sure that the flow is not too fast and that the end of the hose is looped, so the water and PL do not go into the side of the tank and create a circular flow. Once the PL are concentrated, make sure they are equally suspended in the water column for the sampling process. This can be done with a bottom aeration grid (Fig. 7) in large tanks or by hand in smaller tanks. Putting a little activated charcoal in the bottom of the tank makes it easier to visualize whether or not the water is well mixed. The charcoal will be suspended in the water and not sit on the bottom or in one spot if the water is well mixed. As soon as the PL are well mixed, at least seven grab samples should be collected. This is done by quickly submerging a sampling beaker, held upside down, into the center of the water column, turning it over and quickly withdrawing it. Specialized sampling equipment such as a Henson-Stempel pipette (Fig. 8) also can be used. Be careful not to artificially increase the volume of the beaker by holding your hand around the top of the container; this will cause you to overestimate the number of shrimp. The contents of the beaker are then placed in another container with clean water until at least seven samples are taken. The first five sub-samples should be counted. We prefer using a spoon to remove the shrimp individually, but using an eye dropper or pouring the shrimp into another container also works. Once five samples have been counted, the mean, standard deviation and coefficient of variation (CV = 100 x st. dev./mean) are calculated. If the CV is above 10 percent the remaining two samples should be counted. If the CV is 10 percent or less you do not need to count the remaining samples. If the number of shrimp in one sample is very different from the others, it should be discarded. Once the counts are made you can determine the total number of shrimp.
Example: Using a 50-ml sub-sample and a 50-L concentrator, we found the following counts: 495, 452, 562, 510 and 520. Mean = 507.8 PL per 50-ml sample. St. dev. = 35.69. CV = 35.69 x 100/507.8 = 7.03. The other two samples do not need to be counted. If the average count is 507.8 shrimp in a 50-ml sample, there would be 10,156 shrimp per L, so in a 50-L concentrator there would be a total of 507,800 shrimp.
Gravimetric Counting of Advanced PL or Juvenile Shrimp
This technique is the one used most often for nursed shrimp, as these will be large PL or juvenile shrimp. Because larger shrimp are better swimmers, the volumetric method can be misleading. To determine the number of shrimp on a weight basis, one needs an accurate scale, a method of concentrating the shrimp, and an oxygenated transport tank for holding and moving the shrimp to their final destination. The method requires that all shrimp be weighed. If the weather is hot, weigh at night or early in the morning. Most nursery facilities install drain harvest basins to collect and concentrate the shrimp at harvest. If a harvest basin is not installed, a simple seine or nets with suitable mesh will work. The most important thing is to make sure the outside temperature is cool and that the shrimp are not handled roughly or packed too densely when out of the water or exposed to low concentrations of dissolved oxygen. Handling is stressful to the shrimp, so make sure workers are well-trained before moving large numbers of shrimp. As a rule-of-thumb, for short trips of 10 to 30 minutes you can load 0.42 to 0.83 pounds per gallon (50 to 100 g/L).
The first thing to do is determine the number of shrimp per unit weight. This can be done either before harvesting or during harvesting. If done before harvesting, collect a sub-sample of shrimp using a small net with the same mesh size as that used to de-water and concentrate the shrimp. Each culture tank must be sampled because shrimp size is likely to vary considerably. First place a container (bucket) with a small amount of culture water on the scale and tare the scale (i.e., zero the scale). Then collect a small sample of shrimp in the net, hold the net out of the water for 15 to 20 seconds so excess water drains off, and then dump the shrimp into the container of water (do not put the net in the water or splash water out of the container). Record the weight of the shrimp and count all the shrimp in the container.
Calculate the average weight of the shrimp (total weight/number of shrimp) for each sample. Weigh and count at least three samples per tank and determine the CV. If the CV is greater than 10 percent, count two more samples. When taking these samples, it is important to use a dip net with a large enough opening to prevent a biased sample. Large shrimp tend to avoid a dip net with a small opening and fine mesh. Hence, it is best to use a mesh that is just large enough to retain the smallest shrimp. It is best to sample along the bottom and up a wall, catching a larger sample of shrimp than desired. Then allow the water to drain and remove a sub-sample for weighing. If shrimp are < 0.2 g, the sub-sample can be a large spoonful. If shrimp are > 0.5 g, take a small handful. If too large a sample is taken you will be counting for some time, so keep the numbers per sample reasonable (about 300 to 500 shrimp). The number of shrimp per unit weight can be determined just before harvesting or as the nursery tank is being harvested.
After an average weight is determined, the shrimp are harvested, concentrated and weighed in small batches. Remember that you will have to de-water the shrimp (allow some of the water to drain from the shrimp harvest basket before weighing), so you do not want to concentrate them too much. Weighing 2.2 to 4.4 pounds (1 to 2 kg) of juvenile shrimp at a time is adequate, provided the layer of shrimp on the bottom of the harvest basket is not more than 2 inches (5 cm).
PL Evaluation
There are a number of ways to evaluate the quality of PL before they leave the hatchery. These tests do not determine whether or not the PL are virus-free. Only very healthy, pathogen-free shrimp should be used in the U.S. All states require that hatchery stocks be monitored for specific diseases and certified free of disease before shipment. There-fore, shrimp are tested for specific pathogens ahead of time using PCR or microscopy (electron or light).
Stress Test Evaluation
Before shipping, PL should be subjected to a series of stress tests to ensure their quality. There are several types of stress tests that can be used, including temperature, salinity, formalin and pH stress tests. At least two tests should be used for each batch of PL. Each test will require 300 PL. Place groups of 100 PL in containers with 15 L of aerated water. Record survival after 1 hour. If the average from the three replicates is lower than 60 percent, the PL should be rejected. The test should always be performed on 6- day-old shrimp to standardize the tests. As PL of different ages can withstand different levels of stress, it is important that some degree of standardization be used. Because salinity and formalin stress tests are the most effective and the easiest to perform, we recommend routine use of these two tests.
The procedure is as follows:
- Salinity test: Dilute seawater with distilled water to 5 to 15 ppt (the lower salinity for 6-dayold or older PL) and fill three 15-L containers.
Formalin test: Add formalin to seawater for a concentration of 150 to 200 ppm and fill three 15-L containers.
Temperature test: Fill three 15-L containers with seawater at 20 °C. PL are transferred from ambient temperature of 28 to 30 °C directly into the chilled water. - Select 100 PL at random and add them to each of the three containers. Three replicates should be made for each batch of PL to be tested.
- Record survival after 1 hour
- If the survival for the three replicates averages less than 60 percent the PL should be rejected or their quality further evaluated.
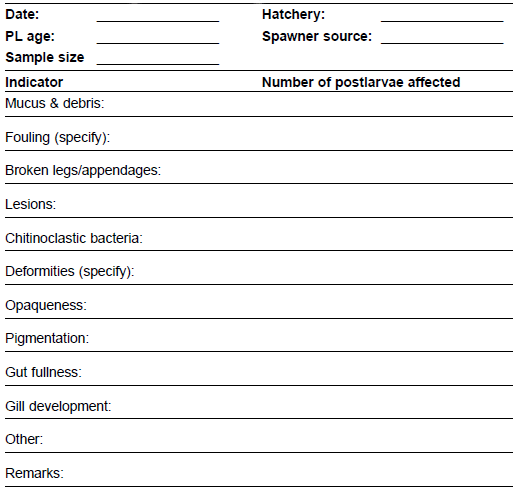
Record stress test results on a data sheet to establish correlations between PL survival in stress tests and performance in the nursery and grow-out phases. Obtain additional data from the hatchery to use in the microscopic evaluation of PL (Table 2). This information should include: 1) source of nauplii (wild spawners, captive broodstocks, etc.); 2) spawn size; 3) percent hatch; 4) percent survival and the time needed to reach the first protozoea stage (A I stage); 5) percent survival and the time needed to reach the mysis one stage (M I stage); 6) percent survival and the time needed to reach the first PL stage (PL 1 stage); and 7) size at PL 1 and PL 6.
Microscopic Evaluation of Postlarvae.
If feasible, also take a few random PL samples from the larval rearing tanks and preserve them for histology.
Stress tests are not absolute indicators of quality and their use is relatively new. However, in conjunction with microscopic and visual evaluation of PL, and evaluation of hatchery performance, stress tests provide a good preliminary assessment of PL quality. These observations, along with assessment of juveniles at the 1-g size, provide important management information which is then correlated with grow-out performance.
Microscopic Evaluation
Microscopic evaluation helps you further evaluate the PL quality before packing at the hatchery for shipment to the farm. If the evaluation cannot be done at the hatchery it should be done at the farm. A sub-sample of 20 to 30 PL should be checked from each larval rearing tank or from the harvesting basket.
If taken from the tank, a volume of 1 to 5 L will be required. If taken from the harvesting basket, a much smaller volume will be needed. Concentrate the PL by pouring the water with the PL into a strainer with 350-micron mesh screen. Dip the PL in the strainer in a cold seawater bath (4 °C) before the observation. Then transfer the PL one by one from the strainer into a single drop of cold seawater on a 4-inch (10-cm) petri dish. PL can be transferred with an eye dropper or pipette (e.g., Pasteur pipette).
Check PL individually under a dissecting scope equipped with bottom and top illumination. Move the PL with a dissecting needle for better observation. Record the information from the observations on the data sheet (Table 2). Record the following parameters for each PL:
- Mucus and debris on setae.
- Fouling organisms (sessile ciliates, benthic algae, filamentous bacteria, fungi, etc.), especially on gills.
- Broken walking legs (periopod) or antennae.
- Lesions on walking legs/swimming legs (pleopod) and antennae, along with/without chitinoclastic bacteria infection.
- Evidence of brown spots on the body.
- Deformities in eye stalks, rostrum, first and second antennae, tail segments and walking legs.
- Opaqueness of tail segments and swimming legs.
- Body pigmentation and hepatopancreas color.
- Gut fullness and shape.
- Gill development.
Postlarvae Evaluation During Acclimation
Monitoring PL behavior closely during the acclimation process should help in identifying stressproducing factors. Observe PL in a 1-L sample taken in a glass beaker or any other transparent container. Observe PL for: 1) cannibalism; 2) molting; 3) mortality; 4) gut content; 5) swimming\activity; 6) pigmentation; and 7) tail muscle opaqueness. If signs of stress are evident, carefully review water quality parameters to determine the cause.

